


Paint for kitchen cupboards: The UK Guide to Prep, Apply & Finish
When it comes to the best paint for kitchen cupboards, you'll want a specialist formula that can handle everything a busy kitchen throws at it—think moisture, grease, and daily knocks. Look for tough, wipeable options like satinwood or eggshell finishes, ideally in a modern water-based or hybrid acrylic paint. These give you a durable, professional-looking surface that resists chipping.
Why a Fresh Coat of Paint Is Your Best Kitchen Upgrade
Thinking of a kitchen refresh? Before you start tearing out units and bracing for weeks of disruption, consider what a huge difference a simple coat of paint can make. It's genuinely one of the most effective and wallet-friendly ways to completely transform the heart of your home.
This guide is for any UK homeowner looking to roll up their sleeves and tackle a truly rewarding DIY project. We'll take you through everything you need to know, from choosing a paint that will last to getting that perfectly smooth, professional finish.
The Power of a DIY Makeover
Getting a kitchen professionally sprayed can set you back thousands of pounds. The good news? With a bit of patience and the right know-how, you can get a result that looks just as good for a tiny fraction of the cost. It all comes down to good prep and the right products.
Here’s why it’s such a smart move:
- It's incredibly cost-effective. Painting is always going to be far cheaper than replacing your cabinets. You can get that high-end, bespoke look for the price of a few tins of paint and some sandpaper.
- You get total creative control. Fancy a deep navy blue, a calming sage green, or a classic off-white? You have complete freedom to choose the exact colour and finish to match your personal style.
- There's far less disruption. A full kitchen refit can turn your home into a building site for weeks. Painting, on the other hand, can be done over a long weekend with much less upheaval.
- It boosts your home's value. A clean, modern kitchen is a massive draw for potential buyers. This small weekend project can make a real difference if you ever decide to sell.
A great paint job does more than just update the look of your kitchen; it actually protects and extends the life of your cupboards. It's a brilliant, sustainable choice that keeps perfectly good units from being thrown away.
Think of this guide as your roadmap to a stunning kitchen makeover you can be proud of. We’ll cover all the essentials to get it right the first time, right down to the finishing touches. Something as simple as swapping the hardware can elevate the entire project—you could complete the new look with something like these stylish black cabinet drawer pulls.
How to Choose the Perfect Paint for Your Cupboards
Getting the paint right is probably the single most important decision you'll make for this whole project. Your kitchen is a battlefield—think steam from the kettle, splattering grease from the hob, and doors being opened and closed all day long. Your standard wall emulsion just won't cut it. You need something specifically made for the job, a paint that’s tough, wipeable, and gives a flawless finish.
Honestly, this is the difference between a paint job that looks brilliant for years and one that starts to chip and peel within a few months. Let's break down exactly what you should be looking for.
What’s in the Tin? Understanding Paint Bases
First things first, let's talk about the paint's formula. When you're browsing the aisles, you’ll mainly come across three types, and each has its own quirks.
- Water-Based Paints: These are what most of us DIYers use these days. They’re low-odour, dry pretty quickly, and you can clean your brushes with just soap and water. Modern water-based formulas are incredibly tough and more than up to the challenge of a busy kitchen.
- Oil-Based Paints: The traditional choice for a rock-hard finish. The downside? They have a very strong smell, take ages to dry, and you'll need white spirit to clean up. They also have a tendency to yellow over time, especially whites and creams.
- Hybrid Paints (Water-Based Alkyd): These clever formulas aim to give you the best of both worlds. You get the hard-wearing, smooth finish of an oil-based paint but with the easy cleanup and low VOCs (volatile organic compounds) of a water-based one.
For most projects, a top-quality water-based or hybrid paint is your best bet. They’re much friendlier to work with and deliver fantastic, long-lasting results without the headache of harsh fumes.
Getting the Sheen Right
The finish, or sheen, of your paint doesn't just affect how your cupboards look—it’s also about how well they stand up to stains and scuffs. As a rule of thumb, the glossier the finish, the tougher and more wipeable it is.
Comparing Kitchen Cupboard Paint Finishes
To make sense of the options, it helps to see them side-by-side. Each sheen has a distinct look and practical pros and cons, so it's worth thinking about what your kitchen really needs.
| Finish Type | Sheen Level | Durability & Cleanability | Best For |
|---|---|---|---|
| Eggshell | Low Sheen | Good durability, but can be harder to clean stubborn stains. | Creating a modern, low-reflection finish that hides minor imperfections well. |
| Satin | Medium Sheen | Excellent durability and very easy to wipe clean. | The most popular choice for a balance of washability and a subtle, elegant look. |
| Semi-Gloss | High Sheen | The most durable and easiest to clean of all options. | High-traffic kitchens where maximum durability is the top priority. Can highlight imperfections. |
Ultimately, the right sheen comes down to finding that sweet spot between aesthetics and practicality for your home.
For most UK kitchens, a satin finish is the perfect compromise. It gives you that lovely, soft lustre that looks incredibly smart, but it's also tough enough to handle daily life. It’s a reliable and stylish all-rounder.
Just remember, the higher the sheen, the more it will show up every little bump and dent. If your cabinets have seen better days, an eggshell or satin finish will be much more forgiving than a semi-gloss. A quality finish also depends on your tools; a professional decorating set makes a world of difference. To get started, you might want to explore a complete paint brush and roller set to ensure you have everything you need.
Choosing Your Colour Palette
Now for the fun part—picking the colour! While you can never go wrong with classic whites and greys, a lot of us are getting more adventurous. Deep, moody colours can create a really sophisticated, high-end feel, while softer tones can make a smaller kitchen feel bright and airy.
We're definitely seeing a big move towards bolder shades. The latest Houzz Kitchen Trends Study in the UK shows a huge shift in what homeowners are choosing. Believe it or not, blue is now the top choice at 18% of renovated kitchens, just sneaking past green at 17%. That leaves traditional neutrals like grey (12%) and off-white (9%) trailing behind. It’s clear we’re all looking to inject a bit more personality into the heart of the home. You can read the full research about these emerging kitchen trends if you're curious.
Before you commit, always test your colours. Paint a large sample onto a piece of card and stick it to a cupboard door. Watch how it looks at different times of the day—in the bright morning sun and under your artificial evening lights. What looks perfect online can look completely different in your own space, so this step is non-negotiable
The Prep Work: Your Secret to a Flawless Finish
Ask any pro painter what their secret is, and they’ll all say the same thing. It’s not about fancy brushes or expensive paint. The real magic happens long before you even pry open a tin. A stunning, durable finish is almost entirely down to getting the prep work absolutely spot on.
Rushing this stage is the number one mistake people make, and it’s why so many DIY paint jobs end up failing. If you take the time to do it right, your chosen paint for kitchen cupboards will stick beautifully and stand up to the daily chaos of a busy kitchen. Let's walk through what you need to do.
First Things First: Detach and Label Everything
Before you can even think about paint, you need to clear the decks. Empty your cupboards and find a temporary home for everything inside. Then, carefully remove all the doors and drawer fronts from the cabinet frames. Trust me, trying to paint them while they’re still attached is a recipe for drips and a messy, uneven finish.
A little bit of organisation here will save you a massive headache later. As you take each door off, stick a bit of masking tape on the inside and give it a number that matches its spot on the frame. A simple system like "T1" for the top left door, "T2" for the next one, and so on, makes putting it all back together a breeze. Pop all the screws, hinges, and handles into labelled zip-lock bags so nothing goes astray.
Pro Tip: Grab a piece of paper and draw a quick sketch of your kitchen layout, numbering the cabinets on your drawing. This little map is a lifesaver when you’re tired at the end of the project and just want to get the doors back on correctly.
You'll need to lay the doors flat to paint them. Find a clean, dust-free space like a garage, a spare room, or even a covered patio if the weather’s behaving. It's a good idea to prop them up on painter's pyramids or small blocks of wood. This little bit of lift lets you paint the edges and surfaces without them sticking to your dust sheets.
The Deep Clean: Banish That Kitchen Grime
Over the years, kitchen cupboards become magnets for a sticky film of grease, cooking oils, and general grime. Paint simply will not stick to a greasy surface, no matter how good it is. This step is non-negotiable.
Your best friend for this job is a good degreaser. Sugar soap is a classic for a reason, but any dedicated kitchen degreasing spray will work wonders.
- Mix your cleaning solution according to the instructions on the packet.
- Using a scrubbing sponge or a sturdy cloth, give every single surface a thorough wash – fronts, backs, edges, and the cabinet frames themselves.
- Pay extra attention to the areas around the cooker and handles, as that’s where grease really builds up.
- Once you've scrubbed everything, wipe it all down with a clean, damp cloth to get rid of any soapy residue. Then, let it all dry completely.
You’ll probably be surprised (and a bit horrified) by how much gunk comes off. But that grime is precisely what would cause your lovely new paint to chip and peel within weeks. Getting rid of it is your first big win.
Sanding for Grip: It's All About the Scuff
Sanding isn’t about taking the cupboards back to the bare wood. Not at all. The aim here is just to "scuff up" the surface, removing that slick, shiny top layer. This creates a slightly rough texture that your primer can really grab onto, which is vital whether you have wooden, laminate, or melamine cupboards.
A medium-grit sandpaper, something around 120-grit, is perfect for this. You can sand by hand with a sanding block (which helps apply even pressure), or you can speed things up on the big flat areas with an electric palm sander. You're just looking for a light but thorough pass over all the surfaces you plan to paint. You’ll know you’re done when the glossy sheen is gone and you're left with a dull, matt-looking finish.
Sanding creates a lot of fine dust, and dust is the enemy of a smooth paint job. Use a vacuum with a brush attachment to get it all out of the nooks and crannies, and then follow up with a tack cloth. Don't be tempted to skip the tack cloth – it’s brilliant at picking up the microscopic dust that a regular cloth just pushes around.
This focus on detailed prep reflects what's happening in UK kitchens right now. We've seen a 147% surge in blue kitchen sales in the last year, making it the fastest-growing colour choice. It seems people are moving towards cooler, brighter shades. This makes sense when you see that 37% of UK kitchen projects are started because of wear and tear, making a good paint job a popular and cost-effective alternative to a full rip-out and replacement.
Priming: The Foundation for Your New Colour

We're finally at the last, and arguably most important, prep step: priming. Think of primer as the essential bridge between the old cupboard surface and your new paint. It blocks stains from bleeding through, makes sure your final colour looks rich and true, and gives the topcoat the perfect surface to bond to.
The right primer depends on what your cupboards are made of:
- For Wooden Cupboards: A quality water-based wood primer-undercoat will do the job perfectly.
- For Laminate or Melamine: This is where you absolutely must use a specialist primer. Look for something labelled "high-adhesion" or "difficult surface" primer, as these are formulated to stick to slick, non-porous materials.
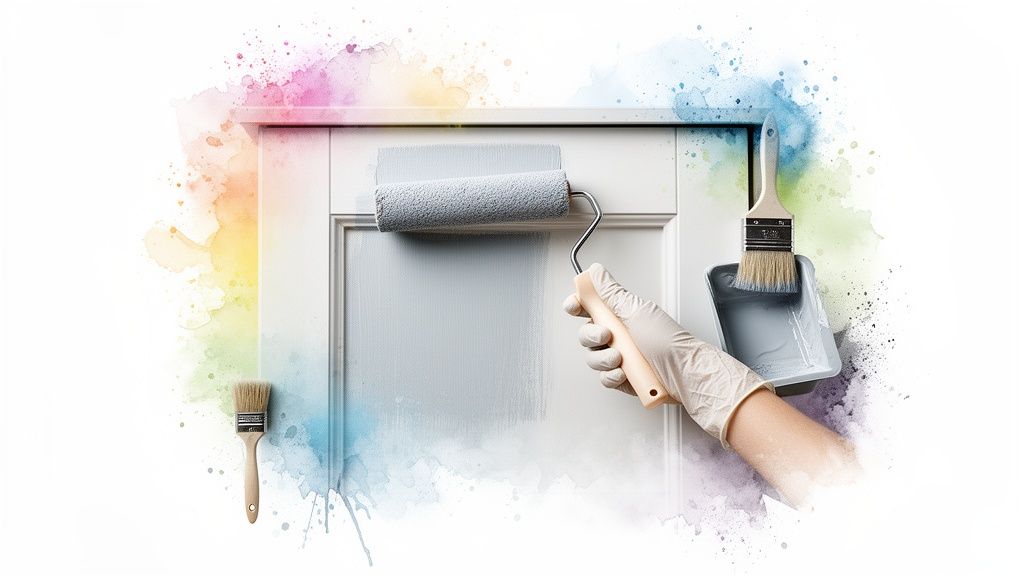
Apply one even coat of primer. I find a small brush is best for getting into any detailed bits, while a mini foam roller gives a great finish on the flat panels. Just like with the cleaning and sanding, you need to prime everything—fronts, backs, and the cabinet frames.
Once it’s fully dry (check the tin for the exact timings), you can give it a very light going-over with fine-grit sandpaper (around 220-grit) to make it feel super smooth, wiping away any dust with a tack cloth afterwards. You can find decent painters masking tape that's perfect for protecting your walls and worktops during this stage.
And that's it! With the hard work done, your cupboards are finally ready for their colour transformation.
Applying the Paint Like a Pro
Right, the prep work is done and dusted. Now for the fun part—getting some colour on those cupboards! This is where you’ll see your kitchen come to life, but don't rush it. Your painting technique is every bit as important as the prep, and it’s what separates a professional, factory-smooth finish from one covered in drips and brush marks.
The real secret here isn't to slap on one thick, heavy coat. That's a recipe for disaster. Instead, you're aiming for multiple thin, even layers. This slow-and-steady approach builds a much tougher, more resilient finish that won't chip easily, and it gives the colour a real depth and consistency.
So, let’s get into the nitty-gritty of how to do it right.
Choosing Your Weapon: Brush, Roller, or Sprayer?
The tool you pick has a huge impact on both the speed of the job and the final texture. Honestly, there isn't one "best" tool—it's about what works for you, your cabinet style, and the look you want.
- A decent brush: An angled brush is your best mate for getting into corners and fiddly bits, like the grooves on Shaker-style doors. The trick is a light touch and long, smooth strokes to keep brush marks to a minimum.
- A mini foam roller: For all the flat surfaces, a high-density foam roller is a game-changer. It gives you a beautifully smooth, almost spray-painted finish and is so much faster than just using a brush. A complete set, like this handy 7-piece mini paint roller kit, is a great shout.
- A paint sprayer: If you want the ultimate smooth finish and speed is a priority, a sprayer is the way to go. But be warned: they have a steep learning curve and you’ll spend ages masking absolutely everything to protect it from overspray.
For most people doing this at home, the winning combination is a good brush for the details and a mini foam roller for the flat panels. It gives you the perfect mix of speed, control, and a top-notch finish.
Mastering the Application Technique
Got your tools? Great. Now it’s all about how you use them.
A good tip is to start with the backs of the doors. It's a low-stakes way to get your technique down before you move on to the more visible fronts.
When you start on a door, use your brush first to paint any recessed panels or grooves. Then, while that paint is still wet, immediately go over the flat areas with your foam roller. This little trick is called "laying off," and it works wonders to smooth out brush marks and blend everything together seamlessly.
Top Tip: The key to a flawless finish is to always maintain a "wet edge." This just means you should never let the edge of your painted section dry before you paint the bit next to it. Always work from the unpainted area back into your last wet stroke. This prevents those ugly, visible overlap lines.
Work on one door or one section at a time to keep that wet edge going. Go easy with the roller, too—if you press too hard, you’ll just squeeze paint out of the sides and create ridges.
Don’t panic if the first coat looks a bit patchy or thin. That’s totally normal! You're building up the finish, and the second coat is where the magic really happens.
The Importance of Patience: Drying and Recoating
This is where so many DIY projects go wrong. Rushing the drying time is a classic mistake. Just because the paint feels dry to the touch doesn't mean it's cured. Slapping on a second coat too early can cause the first layer to drag, bubble up, or even peel off, and you’ll have to start again.
Always check the paint tin for the manufacturer’s recommended recoating time. For most water-based paints, you’re looking at four to six hours, but this can change depending on how warm or humid the room is.
Once the first coat is properly dry, grab some super-fine 220-grit sandpaper and give every surface a very light once-over. This tiny step makes a massive difference, as it gets rid of any dust nibs or minor imperfections, leaving a silky-smooth surface for the next coat. Wipe it all down with a tack cloth to remove every last bit of dust.
Apply your second coat using the exact same technique. For most good-quality paints, two coats will give you a fantastic, solid colour. If you’re making a dramatic colour change (like going from dark wood to white), you might just need a third thin coat to get it perfect.
Finishing Touches and Long-Term Care
The final coat of paint is dry, and your vision is so close to becoming a reality. This is the exciting part, where all your hard work finally pays off. But before you start filling the cupboards, a few final steps will ensure your beautifully painted kitchen looks great for years to come.
First up, should you add a top coat? For most modern cupboard paints, the answer is no. The good stuff is formulated to be tough and durable all on its own, so a separate varnish isn't usually needed.
However, if your kitchen is the chaotic heart of a busy family home—complete with kids, pets, and a lot of daily wear and tear—an extra layer of protection is a smart idea. A clear, non-yellowing, water-based polyurethane varnish acts as an invisible shield against knocks, scuffs, and stains, giving you that extra bit of peace of mind.
Reassembling Your Kitchen with Care
It’s time to put everything back together. Go slowly and carefully here; the last thing you want is a chip or scratch on your perfect new finish. Patience is key.
Hopefully, you kept your labelling system! Putting each door and drawer back in its original home is the secret to getting everything to line up just right.
- Hinges first: Attach the hinges to the cupboard frames before you hang the doors. It's much easier to manage that way.
- Add felt bumpers: Pop new, soft felt pads on the inside corners of your doors and drawers. This tiny detail stops the paint from rubbing and gives you a lovely, quiet close.
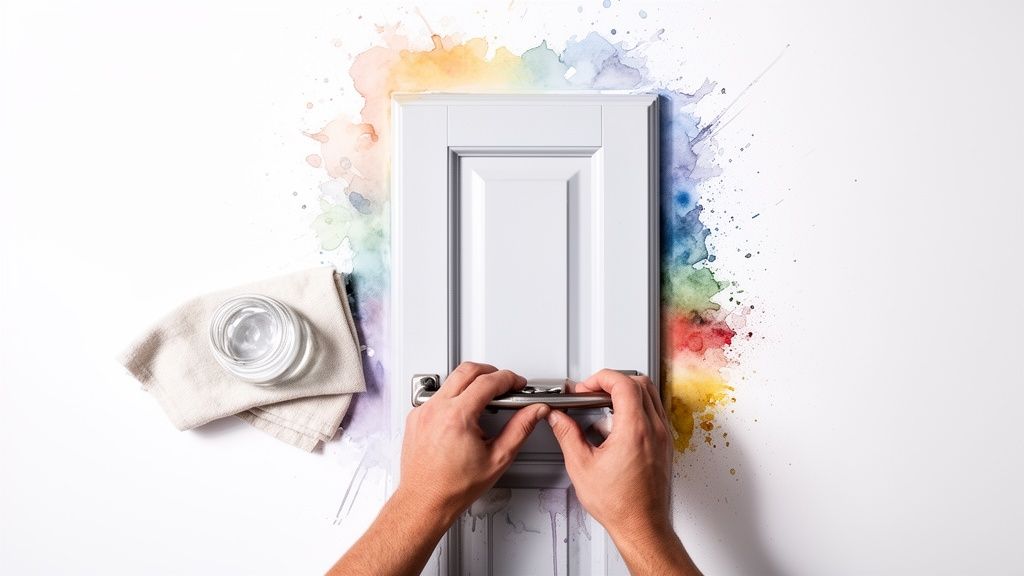
- Hardware last: Once the doors are hanging properly, you can screw your handles or knobs back on.
This is also a fantastic opportunity to upgrade your hardware. Swapping out tired old handles for something new can completely change the look and feel of the kitchen. It’s a small detail that makes a massive impact.
Take your time adjusting the hinges after re-hanging the doors. A few small tweaks to the hinge screws can make all the difference in achieving perfectly aligned, even gaps between each cupboard door for that truly professional finish.
Keeping Your Cupboards Looking Brand New
Looking after your freshly painted cupboards is straightforward, but you need to be gentle at first. The paint can take up to a month to fully harden, or 'cure', so treat it with care for the first few weeks.
For day-to-day cleaning, a soft microfibre cloth and a bit of warm water will do the trick for most spills. If you’re dealing with stubborn grease, a mild, pH-neutral cleaner is your best bet. A good antibacterial surface cleaner spray that is gentle on surfaces is perfect.
What you must avoid are harsh, abrasive cleaners. That means no scouring pads, bleach-based sprays, or anything containing ammonia. These will dull the finish or, even worse, start to strip the colour right off. A little bit of care goes a long way.
This desire to refresh our kitchens fits right in with wider UK trends. While neutrals like grey (12%) and off-white (9%) are still popular, many of us are leaning towards warmer, earthier tones. With 37% of kitchen updates happening because the old one was worn out or didn't work properly, a fresh coat of paint is a brilliant, low-cost way to fall back in love with your space. You can explore more about evolving kitchen trends to get inspired.
Common Questions About Painting Kitchen Cupboards
Even the best-laid plans can hit a snag, and a few questions always seem to pop up when you’re halfway through a big DIY job. Let's tackle some of the most common queries I hear about painting kitchen cupboards. Getting these answers straight from the start can save you a world of frustration down the line.
Knowing how to handle different materials or how long to really let the paint dry can be the difference between a finish that looks amazing for years and one that starts to fail before you’ve even had a chance to enjoy it.
Can I Paint Over Laminate or Melamine Cupboards?
Yes, you absolutely can, but this is a job where the prep work is everything. Unlike wood, these surfaces are completely non-porous and glossy, so paint has nothing to grip onto. If you skip the prep, I can almost guarantee the paint will eventually peel off in sheets.
First, you need to be militant about cleaning. Give the surfaces a thorough scrub with a good degreaser like sugar soap to get rid of every last bit of kitchen grime.
Next comes the most crucial part: you have to kill the shine. Get some fine-grit sandpaper (120-180 grit) and scuff up the entire surface. You’re not trying to remove the laminate, just create a fine, microscopic texture for the primer to bite into.
Once you’ve wiped away every speck of dust, you'll need a specialist primer. Look for a high-adhesion or "difficult surface" primer designed specifically for slick materials. Let that cure properly (check the tin for times), and only then are you ready for your top coats of paint for kitchen cupboards.
What Is Better For A Smooth Finish: A Brush or A Roller?
Honestly, the secret to a finish that looks almost sprayed-on is to use both. Each tool has a very specific job to do, and using them together gives you that flawless, factory-fresh look we’re all after.
- Start with a high-quality, small angled brush. This is for your detail work. Use it to "cut in" around the edges and carefully paint any fiddly bits like mouldings or panel grooves. The aim here is a thin, even coat.
- Immediately follow up with a mini roller. While the brushed paint is still wet, go over all the flat surfaces with a high-density foam roller. The roller’s job is to smooth out the brush strokes and create a beautifully uniform layer of paint.
The real trick is to use a light touch. Don’t press down hard with the roller; just let it glide over the surface. This technique, sometimes called "tipping off," seamlessly blends everything together, leaving you with a stunningly even finish without any of that lumpy, "orange peel" texture.
How Long Until I Can Put My Cupboard Doors Back On?
This is where your patience gets its biggest test, and it’s a corner you really can't afford to cut. Paint might feel dry to the touch in a few hours, but it hasn't fully cured. Curing is the chemical process where the paint film hardens to its maximum strength and durability.
For most modern water-based cabinet paints, you need to wait a bare minimum of 48 to 72 hours before even thinking about re-hanging the doors. That’s assuming you’re working in a warm, dry room with good airflow. If it’s cold or damp, you’ll have to wait even longer. For old-school oil-based paints, you could be looking at up to a week.
Putting doors back on too soon is the number one cause of chips, dents, and that awful feeling of a door sticking to the frame. You’ve worked so hard to get this far—give the paint the time it needs to become rock-solid. Always, always check the manufacturer’s instructions on the tin for the full cure time.
At Deal For Any Occasion, we provide all the DIY essentials you need to achieve a professional finish on your kitchen project. Explore our full range of tools and accessories today at https://dealforanyoccasion.com.