


A UK Homeowner's Guide to Black Expanding Foam
So, what exactly is black expanding foam? Put simply, it’s a polyurethane sealant that comes out of the can, hits the air, and then expands and hardens. This creates a solid, airtight, and waterproof bond that’s incredibly useful around the house and workshop.
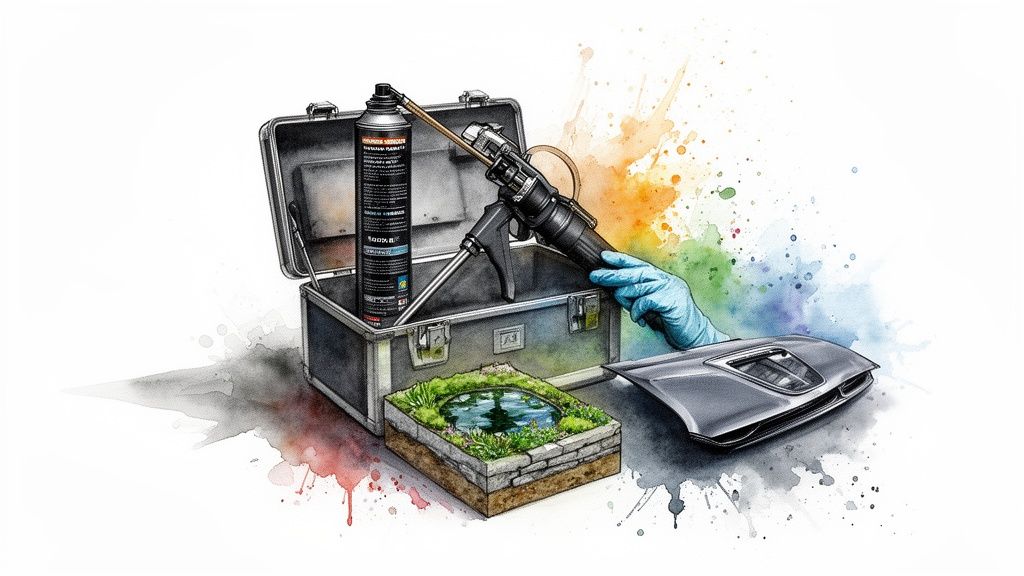
The key difference, of course, is its distinctive black colour. This makes it the go-to choice for any visible repairs where you don't want a glaring yellow or beige patch ruining the look. Think automotive trims, garden ponds, or dark exterior fixtures. It also happens to have better UV resistance than its lighter-coloured cousins, which is a massive bonus for outdoor jobs.
Understanding the Appeal of Black Expanding Foam
At its heart, black expanding foam is a brilliant problem-solver for countless DIY projects. It’s a single-component polyurethane product that reacts with moisture in the air to cure into a tough, rigid material. This makes it perfect for filling awkward gaps, boosting insulation, and sticking different surfaces together. Because it expands so much, it can wriggle its way into all sorts of odd shapes, giving you a perfect seal every time.
It’s no surprise this stuff has become a staple in UK toolkits. For homeowners and professional tradespeople alike, it’s a quick and effective way to sort out insulation and sealing jobs. In fact, the UK spray foam insulation market, which includes products like this, was valued at a whopping USD 106.16 million in 2023 and is set to keep growing. This is all part of a bigger picture where people are focused on making their homes more energy-efficient to cut down on those ever-rising energy bills. You can read up on this market trend over at Credence Research.
Key Benefits for DIY Projects
What really makes black expanding foam stand out is its blend of performance and appearance. While the standard beige foam is fine for jobs that will be covered up, it can be a real eyesore in visible spots. The black version just looks cleaner and more professional, blending in neatly with darker materials and surroundings.
Here’s a breakdown of its practical advantages:
- UV Resistance: The black pigment gives it much better protection against sunlight. This means it won't go yellow and brittle nearly as quickly when it's out in the elements, making it the clear winner for outdoor applications.
- Aesthetic Finish: Whether you're sealing gaps in a car's interior, building a garden water feature, or patching up dark-coloured cladding, black foam gives you a discreet and tidy result without any extra faff.
- Versatile Application: It sticks like glue to almost anything—wood, metal, stone, and most plastics. That makes it a reliable go-to for all sorts of repair and building jobs.
For visible exterior repairs, especially those exposed to sunlight, choosing a black expanding foam isn't just about looks—it's about long-term durability. The added UV protection helps maintain the integrity of the seal for much longer than standard foams.
Common Types You Will Encounter
When you pop down to the hardware shop, you’ll generally find two main types of black expanding foam, and each one has its place.
Handheld Aerosol Cans These are what most people grab for general DIY jobs. They come with a little disposable straw that you attach to the nozzle, making them perfect for quick, small-scale tasks like filling a single crack or sealing around a new pipe. They’re convenient, cheap, and get the job done with no extra kit needed.
Gun-Grade Foam If you're tackling a larger project or need to be really precise, gun-grade foam is the professional's choice. These cans are designed to screw onto a reusable applicator gun. The gun gives you fantastic control over how much foam comes out and the size of the bead, which is a lifesaver for more intricate work. It does mean buying the gun upfront, but it cuts down on waste and delivers a much neater finish.
Deciding which one to get really just depends on the job in front of you. For a one-off fix, a handheld can is all you need. But if you’ve got a big renovation on the go, investing in a proper foam gun will definitely pay for itself.
How to Choose the Right Black Expanding Foam
You've probably stood in the DIY aisle, looked at the wall of cans, and realised they're not all the same. Grabbing the wrong black expanding foam can mean the difference between a job well done and a frustrating mess. To save you that second trip to the hardware shop, let's break down what you actually need to look for.
The right choice really boils down to what you're trying to do. Are you sealing a gap that has to meet fire regulations? Or are you sorting out a rattle in your car where there's constant vibration? Each job needs a specific type of foam.
Fire-Rated vs Waterproof vs Flexible Foam
Let’s get straight to the point and look at the main types you'll find on the shelf and where they really shine. Getting this right is the first step to a pro-level finish.
-
Fire-Rated Foam: This is non-negotiable for any job that involves punching through a fire-resistant wall or floor. Think about sealing gaps around pipes, electrical cables, or ventilation ducts. This foam is designed to swell up in a fire and block smoke and flames for a set period, usually between one and four hours. It’s all about maintaining the fire integrity of the building.
-
Waterproof Foam: This is your go-to for outdoor work or anywhere damp. If you're sealing around window frames, fixing a garden pond, or filling a gap in an outside wall, you need a foam that won't soak up moisture. We'll touch on why that is when we talk about closed-cell foam in a moment.
-
Flexible Foam: Perfect for anything that moves or vibrates. A classic example is in automotive work, like sealing up bodywork or stopping a buzz in a door panel. A standard rigid foam would just crack under that kind of stress, but a flexible foam can take the movement in its stride without failing. For similar projects where you need a bit of give, you might also find a flexible interior filler for decorating repairs useful.
Choosing the right foam isn’t just about getting the job done—it's about safety. If building regulations demand a fire-rated product, using anything else is a serious mistake that could compromise the safety of the property.
Open-Cell and Closed-Cell Structures
Another detail that makes a big difference is the foam's internal structure. It might sound technical, but it directly affects how well it insulates, how strong it is, and whether it lets water in.
Open-cell foam is the softer, spongier stuff. The tiny cells inside aren't completely sealed off from each other, which means moisture can get through. It's a great soundproofer and a decent insulator, but you absolutely don't want to use it anywhere it might get wet.
Closed-cell foam, on the other hand, is much more dense and rigid. Its cells are completely sealed, which makes it fantastic at blocking water. This structure also makes it stronger and gives it a higher R-value (the measure of thermal resistance), so it insulates better for its thickness. For most outdoor jobs and structural fixes with black expanding foam, a closed-cell can is what you should be reaching for.
It's also worth noting that eco-conscious expanding foams are becoming more common in the UK, partly driven by sustainability goals. UK foam imports actually grew by 5.6% from 2023 to 2024, with construction demand leading the way. The best part? Good foam insulation can slash heat loss through walls by up to 50%, making a real dent in your energy bills.
Comparing Black Expanding Foam Types
To cut through the jargon, here's a quick comparison table to help you grab the right can for your specific DIY task.
| Foam Type | Best For | Key Feature | Example Project |
|---|---|---|---|
| Fire-Rated | Sealing service penetrations in walls and floors | Blocks fire and smoke | Filling gaps around new plumbing or electrical wiring |
| Waterproof | Outdoor projects and damp areas | Repels moisture effectively | Sealing cracks in a concrete pond or fountain |
| Flexible | Applications with movement and vibration | Absorbs stress without cracking | Reducing rattles and noise in a car door panel |
| General Purpose | Basic gap-filling and insulation | Versatile and cost-effective | Sealing draughts around an attic hatch |
Think of this table as your cheat sheet. Match your project to the "Best For" column, and you'll be on the right track to a solid, lasting repair.
Applying Expanding Foam Like a Pro
Using black expanding foam can feel a bit like a race against time, but with the right approach, you can get a clean, professional finish every time. Honestly, getting it right isn't about speed – it's all about smart preparation. A few moments spent setting up the job will save you hours of scraping and frustration later on.
First things first: the surface. The foam needs something clean and stable to grab onto. This means giving the area a good wipe-down to get rid of any dust, grease, or loose bits of plaster. Often, a quick brush and a damp cloth are all you need to ensure a solid bond.
Now, for a tip that sounds a bit odd but makes all the difference: lightly mist the surfaces with a spray bottle of water. Polyurethane foam is moisture-cured, so a bit of humidity gives it the kick-start it needs to expand and harden properly. It's a real game-changer.
Mastering the Application Technique
With your area prepped, grab the can. Shaking it is non-negotiable. You need to give it a really vigorous shake for at least 30-60 seconds. This mixes the propellant and the polymer inside, which is crucial for getting that consistent, reliable expansion you want.
Next, attach the nozzle or screw the can onto your applicator gun, making sure it’s on tight. Before you aim it at your project, do a quick test spray onto a bit of old cardboard. This lets you get a feel for the flow rate and expansion, which can vary slightly between cans and is definitely affected by the temperature.
The most common mistake I see is overfilling the gap. You have to remember this stuff grows – a lot. It will often double or even triple in size after you've applied it. Your target should be to fill the gap to about 50% of its depth to leave plenty of room for expansion.
The flowchart below can help you nail down which type of foam is right for your particular job.
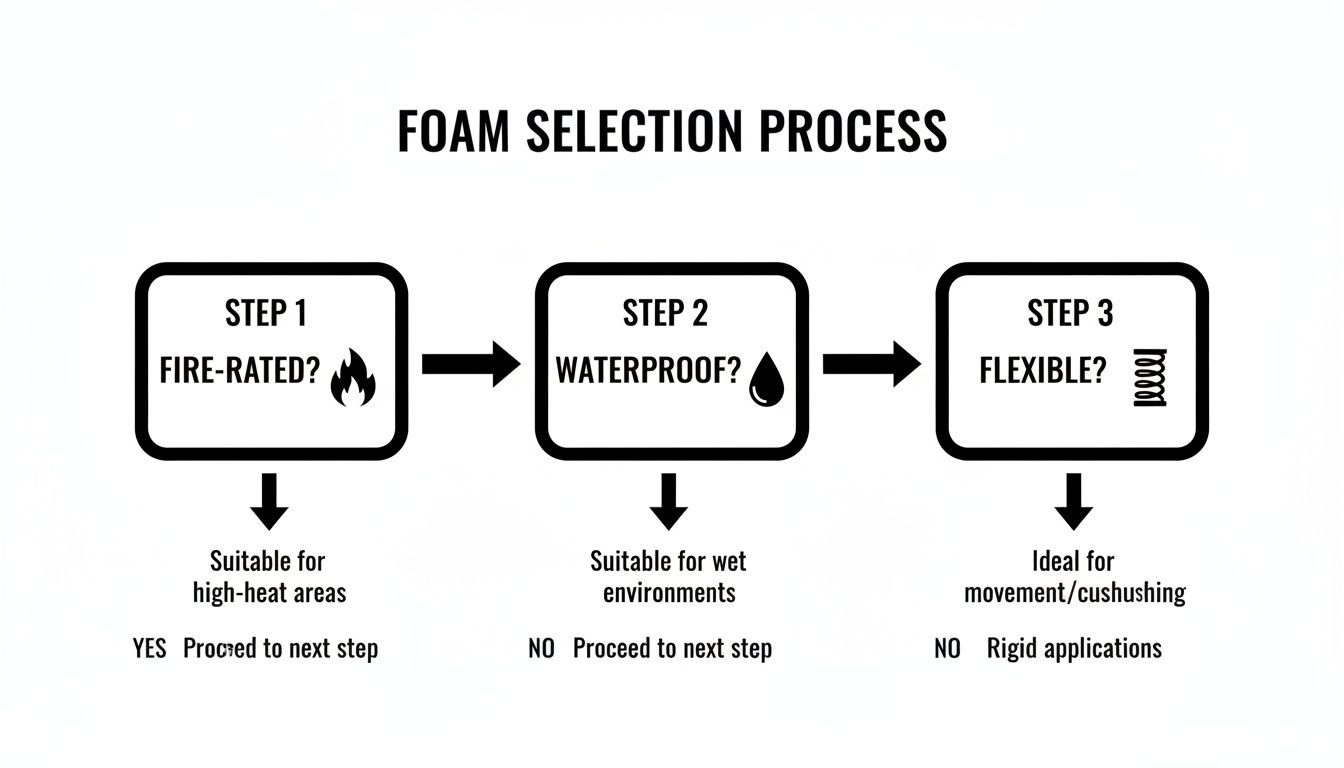
This process makes sure your foam choice matches what the job actually needs, whether that’s sealing a pipe, waterproofing a pond feature, or stopping a panel from vibrating.
If you’re tackling a really big void, don't try to fill it all in one go. The best way is to apply the black expanding foam in layers. Let each layer partially cure before adding the next one. This layered approach creates a much stronger, more stable fill and prevents the very middle from staying gooey and uncured.
Considering Temperature and Curing Times
The weather plays a massive part in how expanding foam behaves. Most cans will have an ideal temperature range printed on them, usually somewhere between 15°C and 25°C. If it's too cold, the foam might not expand properly. Too hot, and it can cure too fast and turn brittle.
Always check the manufacturer’s instructions for specific curing times. As a rule of thumb, the foam will be tack-free (no longer sticky) within 10-20 minutes. But it needs a full 24 hours to cure all the way through before you should even think about trimming, sanding, or painting it. Rushing this stage is a surefire way to end up with a messy, weak seal.
Humidity also has a say in curing. In very dry conditions, the foam will take longer to harden. This is another reason why that little trick of misting the area with water is so useful – it helps create the perfect environment for a strong, reliable cure.
Pro Tips for a Flawless Finish
Getting a neat result often comes down to a few simple tricks of the trade. First and foremost, protect everything you don't want foam on. Once this stuff sets, it’s a nightmare to remove without damaging whatever it's stuck to. We have a guide on the best ways to use polythene dust sheets for painting and decorating which can be a real lifesaver here.
Here are a few more tips to keep in your back pocket:
- Work from the bottom up: When you're filling vertical gaps, always start at the bottom and work your way up. This gives the foam a base to build on and stops it from slumping down under its own weight.
- Control the flow: Try to apply steady, even pressure on the trigger. A jerky, stop-start application will give you an uneven bead and inconsistent expansion. For the best control, you really can't beat a proper foam applicator gun.
- Clean up immediately: Keep a can of foam cleaner or a bottle of acetone nearby. If you get any wet foam where it shouldn't be, you can wipe it away straight away. Once it cures, your only options are elbow grease and a scraper or sandpaper.
How to Finish and Paint Foam for a Seamless Look
So, you’ve filled the gap and the black expanding foam has done its job. But now you’re left with a raw, bumpy surface that sticks out like a sore thumb. Don’t worry, a few simple finishing steps can transform that rough patch into a smooth, seamless repair that blends right in. It’s all about getting the trim, sand, and paint just right.
The first order of business is dealing with any excess foam that’s mushroomed out. This is where a bit of patience really pays off. If you try to trim it before it’s fully cured (give it a solid 24 hours), you’ll end up with a sticky, compressed mess. Once it’s properly hard, the whole job is much cleaner and easier.
Trimming the Cured Foam
To get that foam perfectly flush, you need the right tool for the job. I’ve found that a long, serrated blade works wonders—something like an old bread knife or a small, fine-toothed hand saw. The serrations saw through the foam’s structure instead of just tearing at it, which gives you a much neater cut.
Here’s how I get it right:
- Lay the blade flat against the surface you want the foam to be level with.
- Use a gentle sawing motion to slice off the excess. Don't force it. Too much pressure can compress the foam or cause the blade to slip and gouge the surrounding material.
- Work in stages if you're tackling a large area. Cut off the bulk first, then go back for a final, precise trim to get it perfectly flush.
For tricky shapes or tight corners, a sharp utility knife is a great shout. Just make sure you’re using a fresh blade for the cleanest possible results.
Sanding for a Smooth Canvas
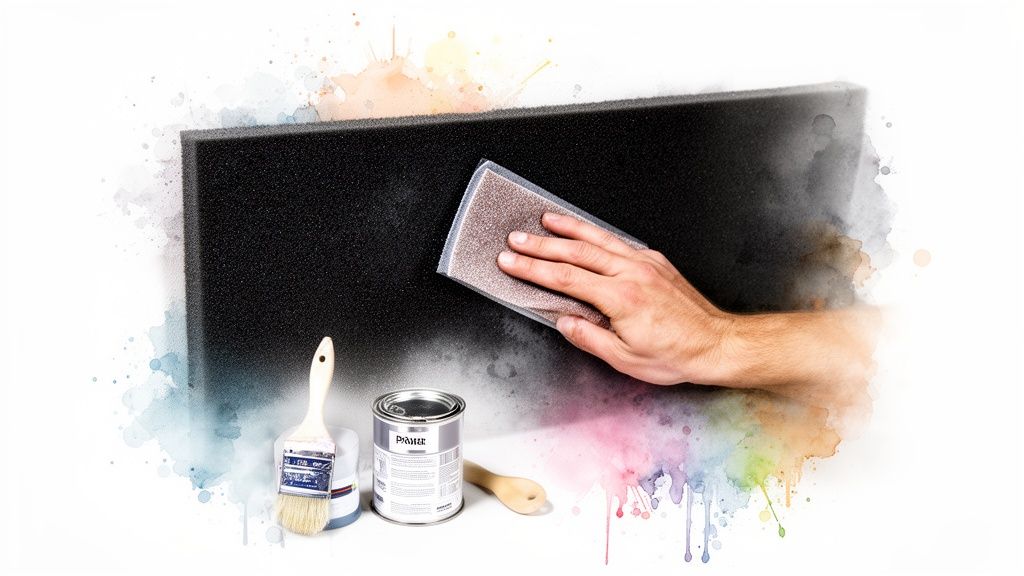
After trimming, the foam surface will be flat but still a bit rough. Sanding is the secret to creating a smooth, uniform base that’s ready for whatever you plan to put over it, be it paint or plaster. You don't need to go crazy here; a medium-grit sandpaper, something around 120-grit, is usually all it takes.
Wrap your sandpaper around a small block to keep the sanding surface flat and even. Using light, circular motions, sand the foam until it feels smooth to the touch and you’ve knocked down any minor high spots from trimming. It’s a good idea to wear a dust mask for this part, as the fine polyurethane dust can be an irritant if you breathe it in.
Don’t be tempted to skip the sanding. It’s probably the most important step for making sure your paint or filler actually sticks and gives you a durable finish that doesn't look like an obvious patch job.
Once you’re happy with the smoothness, just wipe the surface with a slightly damp cloth to get rid of all the dust. This gives your primer a clean, grit-free surface to bond to.
Choosing the Right Paint and Primer
Be careful what you paint it with, as not all paints will work on polyurethane foam. Solvent-based paints are a definite no-go—they can actually dissolve the foam and undo all your hard work. The safest and most reliable options are water-based acrylic or latex paints. They stick well and won’t damage the foam.
But before you even think about the colour, priming is absolutely essential. A good water-based primer does two key things:
- It seals the foam: Expanding foam is like a sponge and will soak up paint. A primer seals these pores, meaning you’ll use way less of your topcoat to get good coverage.
- It helps the paint stick: Primer creates the perfect gripping layer between the foam and the paint, which helps prevent it from peeling or flaking off later on.
Apply one or two thin coats of primer, letting it dry completely between coats. Once that’s set, you’re ready for your topcoat. If you're tackling a larger project, looking into durable finishes like the best paint for kitchen cupboards can offer some great insights. A couple of coats of your final colour, and your foam repair will simply disappear, leaving you with a flawless, professional-looking surface.
Creative Uses for Black Expanding Foam Around the Home
While its main job is sealing gaps, black expanding foam has a surprisingly creative side. Don't just think of it as a draught excluder in a can. Its ability to expand, harden into a lightweight yet solid structure, and grip onto almost anything makes it a brilliant problem-solver for dozens of projects you might not have considered.
Let’s move beyond simple gap-filling and look at how this stuff can tackle jobs all around your home, garden, and garage.
Think about that wobbly fence post that’s been driving you mad for months. Instead of the hassle of digging it all up, you can inject foam right into the gap between the post and its concrete base. As it expands and cures, it creates a solid, custom-fit brace that locks the post firmly in place. It's a quick fix that holds up surprisingly well against the unpredictable UK weather.
Garden and Outdoor Projects
In the garden, black expanding foam really comes into its own. Its dark colour and UV resistance are perfect for jobs where it might be seen, as it blends in far better than the usual yellow stuff.
I’ve seen people do some amazing things with it, like building lightweight, artificial rock features for garden ponds. They'll create a basic wire mesh frame, spray the foam over it, and then get to work carving it into shape once it's cured. A quick coat of stone-effect paint and you’ve got a realistic-looking rockery without the back-breaking work of shifting heavy stones.
You can also use it for:
- Insulating a shed roof: A thin layer sprayed between the rafters makes a massive difference, keeping your shed from feeling like an oven in summer and a freezer in winter.
- Securing decorative stones: Use it like a mortar to bond rocks together for a garden border or a small retaining wall. It’s much quicker and less messy than mixing cement.
- Creating custom planters: Got an oddly shaped container you want to use? Spray foam inside to create a solid, lightweight base you can then fill with soil.
Automotive and Workshop Fixes
In the garage, black expanding foam is a secret weapon for sound dampening and custom storage. Many car enthusiasts use it to fill non-structural cavities in body panels or inside doors. The cured foam is excellent at reducing road noise and vibrations, making for a much quieter ride.
Another brilliant use I've found is making custom inserts for tool cases. Just line your case with plastic sheeting, lay your tools out, and carefully spray the foam around them. Once it’s cured, you'll have a perfectly moulded, protective insert that stops your valuable tools from rattling around and getting damaged. This trick also works wonders for protecting delicate camera gear or electronics. For more tips on everyday fixes, have a look at our detailed guide on how to fix holes in walls and other surfaces.
Don’t be afraid to experiment with black expanding foam as a sculpting medium. Its ability to be easily carved, sanded, and painted makes it perfect for hobby projects, from creating terrain for model railways to building props for cosplay.
Home Office and Indoor Upgrades
The foam’s versatility doesn’t stop at the backdoor. If you've got a noisy home office, applying a layer of foam inside a hollow door can provide a surprising amount of soundproofing. It works by filling that empty space and deadening the sound vibrations before they pass through.
The growth in the DIY market really shows how useful these products have become. Here in the UK, the market for similar materials like expanded polypropylene foam was valued at USD 41.3 million in 2024 and is expected to climb to USD 89.4 million by 2033. This trend shows just how many people are turning to foams for creative solutions, from sealing car accessories to insulating a child’s toy fort. You can read more about these market trends and their growth.
When you start thinking outside the box, you realise a can of black expanding foam is so much more than a gap filler. It's a versatile material for building, insulating, soundproofing, and crafting—a true all-rounder for any dedicated DIYer.
Your Black Expanding Foam Questions Answered
No matter how good the instructions are, you always run into real-world questions once you start a job. Here are some of the most common queries we hear about black expanding foam, with straight-to-the-point answers to get you through the tricky bits.
How Do I Safely Remove Cured Expanding Foam?
It’s a classic DIY problem: a blob of foam escapes and sets rock-hard where you didn't want it. Because this stuff bonds so aggressively, getting it off requires a bit of patience and the right method.
On tough, non-porous surfaces like uPVC, metal, or tiles, your best bet is a physical approach. Carefully shave off the bulk of the foam with a sharp utility knife, holding the blade almost flat against the surface to avoid gouging it. A bit of fine-grit sandpaper can then buff away any lingering residue.
Getting foam off delicate materials like finished wood or your skin is another story. For wood, you still need to scrape it off, but you have to be incredibly careful not to wreck the finish. If you get it on your skin, never reach for harsh solvents. Instead, slather the spot with petroleum jelly or cooking oil, let it sit for a few minutes to soften the foam, and then gently rub it off.
Top Tip: Always start with mechanical removal (scraping, sanding). Only use a chemical foam remover as a last resort, and always, always test it on a hidden spot first to make sure it won’t damage the surface.
Is Black Expanding Foam Waterproof?
This is a great question and a common source of confusion. The simple answer is that closed-cell black expanding foam is highly water-resistant, but not fully waterproof if it's going to be permanently underwater.
Once it cures, its dense structure is brilliant at stopping moisture in its tracks. That’s what makes it perfect for sealing gaps around window frames, outdoor taps, or cracks in a foundation where rain might get in. It will absolutely keep water out in those scenarios.
However, it won't last forever if left exposed to the elements, especially the sun's UV rays, which will break it down over time. For any outdoor job, you absolutely must protect the cured foam to make it last. A quick coat of a decent outdoor paint will shield it from UV damage and add an extra layer of moisture protection, keeping your seal solid for years.
What UK Safety Precautions Should I Take?
Safety first, always. Black expanding foam is a chemical product, and following UK safety guidelines is non-negotiable for a hassle-free project.
Think Personal Protective Equipment (PPE) before you even shake the can.
- Safety Goggles: Protect your eyes from any accidental sprays. It’s a must.
- Gloves: Uncured foam is unbelievably sticky. Wear nitrile or other disposable gloves.
- Old Clothes: Cover up with long sleeves and trousers you don’t mind getting ruined.
Ventilation is also critical. The fumes and propellants can irritate your lungs. If you’re inside, get the windows and doors wide open for a good cross-breeze. In a poorly ventilated space like a small cellar, a proper respirator mask is a very wise move.
Finally, think about disposal. Empty cans are often considered hazardous waste, so don't just chuck them in the household bin. Check your local council’s website for the correct way to dispose of them at the recycling centre. It's also worth noting that damp, sealed areas can sometimes have other problems. If you're tackling a damp issue, it's a good idea to know how to address household mould in our comprehensive guide. A few simple safety steps make all the difference.
At Deal For Any Occasion, we provide all the DIY essentials you need to tackle your next project with confidence. Explore our wide range of tools and materials for your home and garden today. Find everything you need at https://dealforanyoccasion.com.